Homemade Peanut Butter Cups Mini Bites
Highlighted under: Treats & Temptations
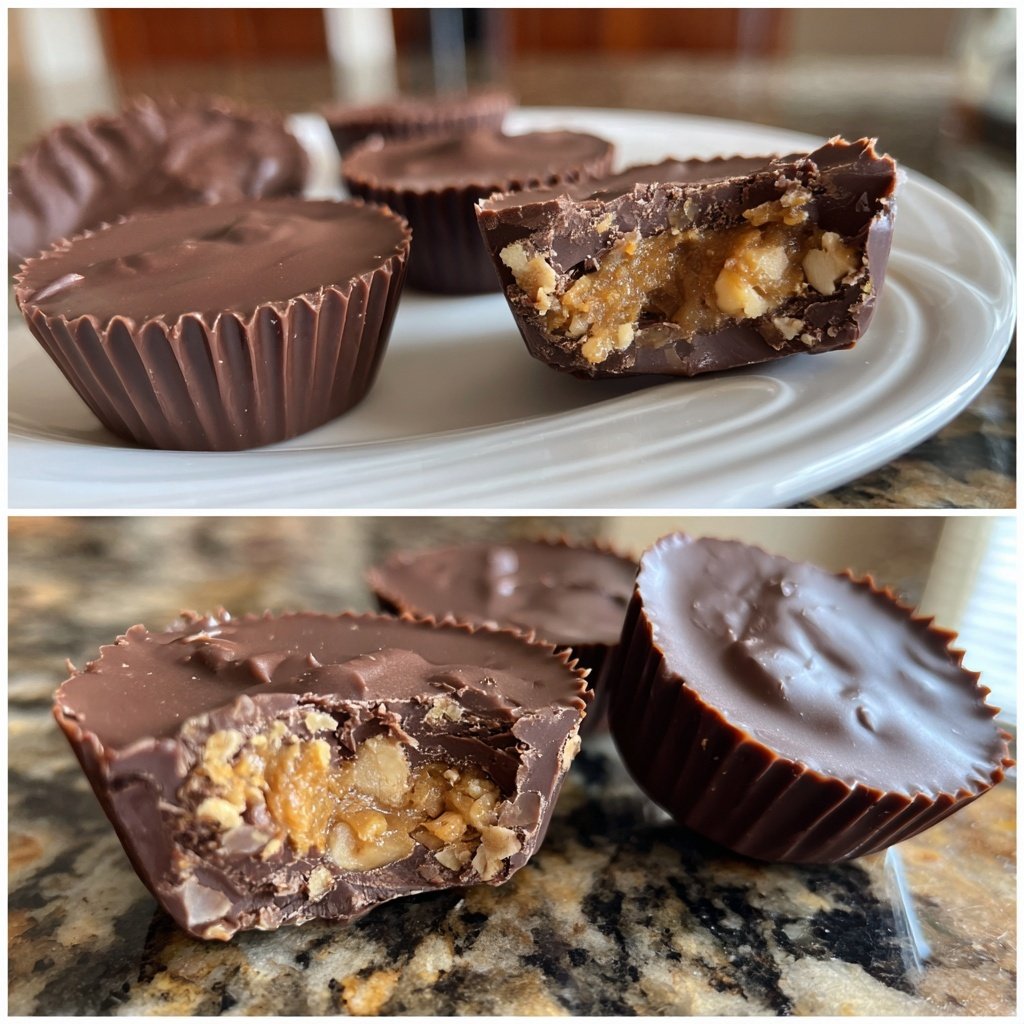
I absolutely love making Homemade Peanut Butter Cups Mini Bites! The combination of smooth peanut butter and rich chocolate creates a delightful treat that’s hard to resist. These mini bites are perfect for satisfying my sweet tooth and are easy to make, requiring just a few simple ingredients. I enjoy how customizable they can be, allowing me to experiment with different types of chocolate or mix-ins. In just a short amount of time, I can whip up a batch that’s great for sharing or indulging myself!

Making these mini bites has become a tradition in my kitchen. I remember the first time I decided to create my own version of peanut butter cups. I meticulously measured out the ingredients and was amazed at how simple the process was. The taste of homemade is truly superior, and I find it hard to stop at just one!
One specific tip I discovered is to freeze the bites for a bit after pouring the chocolate layer, as it really helps with the final texture. The combination of creamy peanut butter and the crisp chocolate shell is simply irresistible. I often share them at gatherings, and they’re always a hit!
Why You'll Love This Recipe
- Rich chocolate flavor perfectly balanced with creamy peanut butter
- Simple and quick to prepare, perfect for a fast treat
- Customizable with your favorite types of chocolate or toppings
Understanding the Ingredients
The beauty of these homemade peanut butter cups lies in the quality of the ingredients used. Creamy peanut butter is essential for achieving that smooth, mouthfeel that complements the chocolate. Opt for a natural, no-stir variety, which adds a pronounced peanut flavor without unwanted additives. If you prefer a bit more texture, crunchy peanut butter can also work; just be aware that it will alter the overall mouthfeel.
Using semi-sweet chocolate chips for the main layer provides a rich contrast to the sweetness of the peanut butter. However, if you'd like a less sweet option, consider using dark chocolate. The pairing of flavors will change, offering a more profound chocolate experience. For the topping, milk chocolate adds a sweet finish; feel free to experiment with white chocolate if you desire a creamier topping.
Mastering the Melting Process
When melting chocolate, patience is key to achieving that perfect, glossy finish. Always melt in short bursts, around 30 seconds, and stir between each interval. This helps prevent overheating, which can cause the chocolate to seize. If you do happen to overheat your chocolate, adding a small amount of vegetable oil can rescue it, restoring that smooth consistency.
If you find yourself without microwave access, using a double boiler is an effective alternative. Simply fill a saucepan with a few inches of water and bring it to a gentle simmer. Place a heatproof bowl on top, ensuring it doesn't touch the water, and stir the chocolate chips until melted. This method provides a more controlled heat and can yield superior results if you prefer a more traditional approach.
Storage and Customization Tips
These homemade peanut butter cups can be stored in an airtight container in the refrigerator for up to two weeks, making them a fantastic make-ahead treat. If you wish to keep them even longer, consider freezing them. Place the bites in a single layer on a baking sheet until fully frozen, then transfer them to a freezer-safe container. They will last for up to three months, and you can grab one whenever a sweet craving strikes!
Customization is where the fun begins. Try adding a sprinkle of sea salt on top of the chocolate layer before freezing for a sweet-salty twist. You can also mix in crushed pretzels, toffee bits, or even a dash of cinnamon to the peanut butter mixture for a unique flavor profile. The possibilities are endless, and experimenting can provide delightful surprises that elevate your homemade treats.
Ingredients
For the Peanut Butter Cups
- 1 cup creamy peanut butter
- 1 cup semi-sweet chocolate chips
- 1/4 cup powdered sugar
- 1 tsp vanilla extract
- 1/2 cup milk chocolate chips (for topping)
Instructions
Prepare the Peanut Butter Mixture
In a mixing bowl, combine the creamy peanut butter, powdered sugar, and vanilla extract. Mix until smooth and well combined.
Melt the Chocolate
In a microwave-safe bowl, melt the semi-sweet chocolate chips in 30-second intervals, stirring in between, until fully melted and smooth.
Assemble the Mini Bites
Using a mini muffin tin, fill each cup with a spoonful of melted chocolate, enough to cover the bottom. Freeze for 10 minutes.
Add the Peanut Butter Layer
After freezing, take the tin out and place a spoonful of the peanut butter mixture on top of the chilled chocolate. Press down slightly.
Top with More Chocolate
Pour the melted milk chocolate on top of the peanut butter layer, ensuring all peanut butter is covered. Return to the freezer for another 10 minutes.
Serve and Enjoy
Once set, pop the mini bites out of the muffin tin and enjoy your homemade peanut butter cups!
Pro Tips
- For a fun twist, try mixing in some crushed pretzels or sea salt on top for added flavor and crunch!
Troubleshooting Common Issues
If your chocolate layer doesn’t set properly, it could be due to a few factors. Firstly, make sure that your melted chocolate was allowed to cool slightly before pouring it over the peanut butter layer—hot chocolate can warm the peanut butter and cause it to melt. Additionally, ensure that your mini muffin tin was well chilled before adding the chocolate; if the tin is warm, it can also interfere with the setting.
In instances where the peanut butter layer is too runny, it could be a result of using a peanut butter with added oils or sugars. For optimal results, go for a standard creamy variety without additional ingredients. If the mixture is too soft, try refrigerating it for an additional 15-20 minutes to firm up before adding the top chocolate layer.
Serving Suggestions
These mini bites are not only delicious on their own, but they also make great additions to dessert platters or party trays. Consider pairing them with fresh fruits like strawberries or bananas to balance the richness of the chocolate and peanut butter. For a fun twist, serve them alongside a scoop of vanilla ice cream for an indulgent dessert experience.
For a themed party, consider making variations of these mini bites. You could create a holiday version by adding crushed peppermint candy on top or a fall-inspired treat with pumpkin spice sprinkled into the peanut butter mixture. These playful variations add an exciting element that maintains the core flavors everyone loves while satisfying seasonal cravings.
Questions About Recipes
→ Can I use natural peanut butter?
Yes, but make sure it’s stirred well as natural peanut butter can be more oily.
→ How should I store the mini bites?
Store them in an airtight container in the refrigerator for up to a week.
→ Can I use dark chocolate instead?
Absolutely! Dark chocolate will add a richer flavor.
→ How can I make these vegan?
Substitute the chocolate with dairy-free versions and use a plant-based butter substitute.
Homemade Peanut Butter Cups Mini Bites
Created by: Penelope Dawson
Recipe Type: Treats & Temptations
Skill Level: Beginner
Final Quantity: 24 mini cups
What You'll Need
For the Peanut Butter Cups
- 1 cup creamy peanut butter
- 1 cup semi-sweet chocolate chips
- 1/4 cup powdered sugar
- 1 tsp vanilla extract
- 1/2 cup milk chocolate chips (for topping)
How-To Steps
In a mixing bowl, combine the creamy peanut butter, powdered sugar, and vanilla extract. Mix until smooth and well combined.
In a microwave-safe bowl, melt the semi-sweet chocolate chips in 30-second intervals, stirring in between, until fully melted and smooth.
Using a mini muffin tin, fill each cup with a spoonful of melted chocolate, enough to cover the bottom. Freeze for 10 minutes.
After freezing, take the tin out and place a spoonful of the peanut butter mixture on top of the chilled chocolate. Press down slightly.
Pour the melted milk chocolate on top of the peanut butter layer, ensuring all peanut butter is covered. Return to the freezer for another 10 minutes.
Once set, pop the mini bites out of the muffin tin and enjoy your homemade peanut butter cups!
Extra Tips
- For a fun twist, try mixing in some crushed pretzels or sea salt on top for added flavor and crunch!
Nutritional Breakdown (Per Serving)
- Calories: 104 kcal
- Total Fat: 7g
- Saturated Fat: 2g
- Cholesterol: 0mg
- Sodium: 45mg
- Total Carbohydrates: 10g
- Dietary Fiber: 1g
- Sugars: 5g
- Protein: 2g